GCSE Free body diagrams Part 2
Free Body Diagrams
You can think of a free body diagram as a simplified force diagram for an object.
A free body diagram will show only the forces acting on an object.
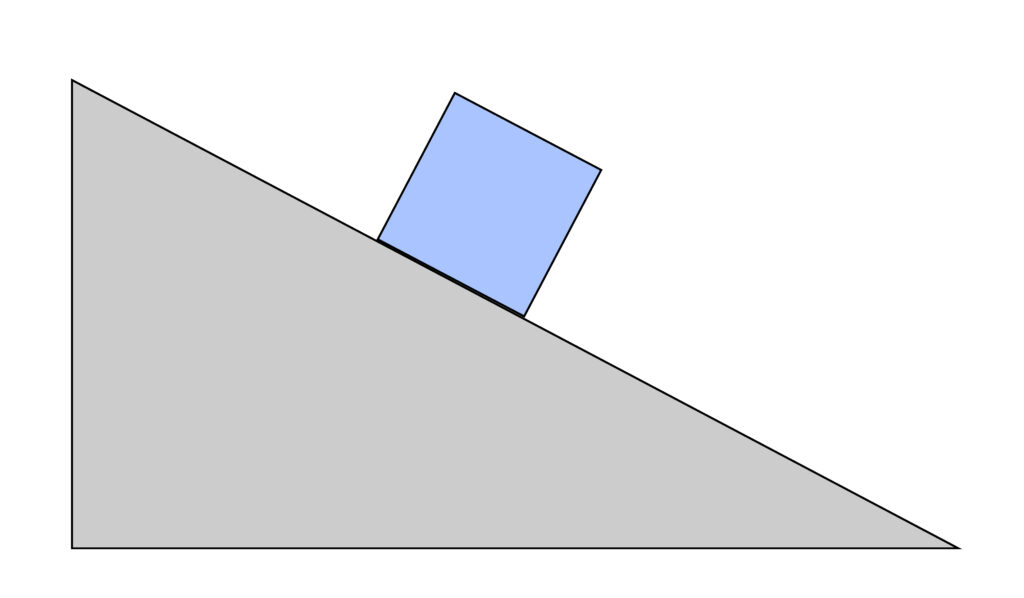
We are going to look at a box sliding downwards on a ramp which is a more complex example than the previous page.

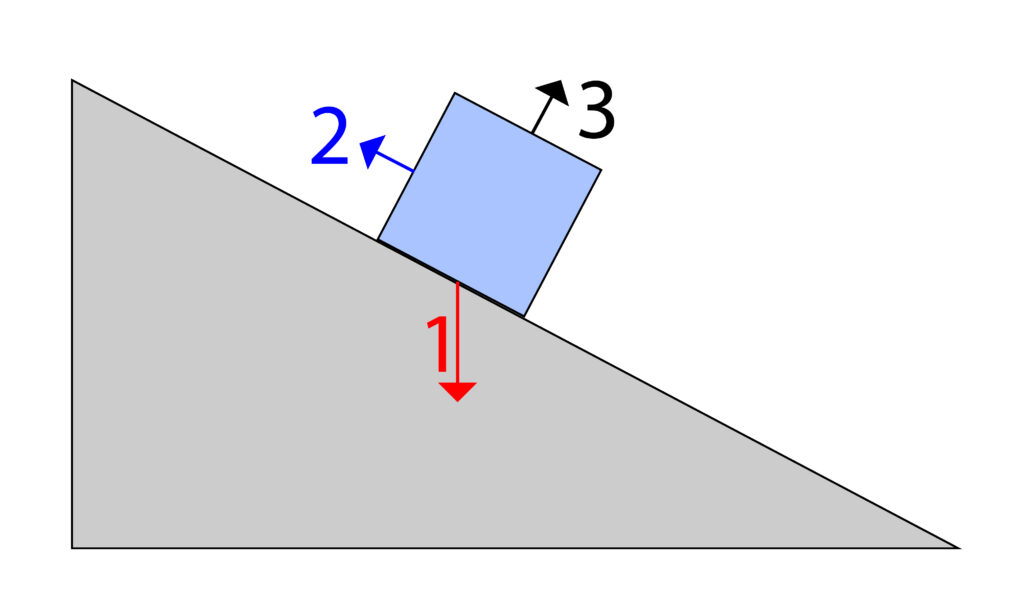
There are several forces acting on this square box.
1. Force of the Earth’s gravity acting on the weight of the box. This arrow will go from the box, directly downwards. Force arrow 1
2.As the box is sliding downwards, there will be a force of friction which is in the opposite direction. Force arrow 2
3. Reaction force from the ramp pushing upwards on the box. Force arrow 3
There are other forces, but these are not acting on the box. So, these have not been included. Lets put those forces onto the diagram.

In most cases the reaction force from the ramp (Force 3) is normally shorter than Weight force (Force 1). There is a reason, but it goes beyond GCSE.
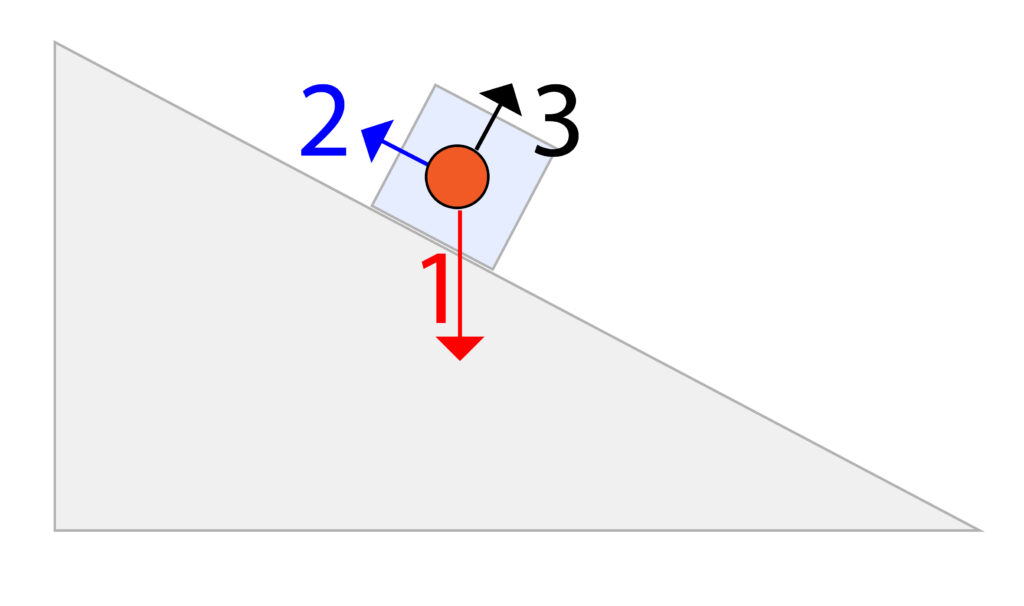
In a true free body diagram we should not include the ramp. So, the free body diagram can be found below

The box and the ramp have been obscured in the background, so you can just see them to allow you to see where the force arrows are located.
However, only the box should be present, which has been represented in the free body diagram as an orange circle.
Practice Questions
1a. The box in the diagram is replaced with a box with a larger mass. State how the force arrows would change.
1b. Draw a free body diagram to represent a sled going down a slope covered in snow.
1c. Suggest how the angle of the ramp would affect the normal force, in this case Force 3.
Absorption and Emission of EM Radiation
JJ Thomson and Plum pudding model
Ernest Rutherford and the Nuclear Model
Niels Bohr changing the Nuclear Model
Discovering the Proton and Neutron
Measuring radiation from radioactivity
Radiation types and properties
Random nature of radioactive decay
Radioactive contamination or irradiation
Hazards of contamination and irradiation
Studies on the effects of radiation on humans
Different half lives of radioactive isotopes
Nuclear Fission Chain Reaction
Writing nuclear fission equations